About Me

- Tonya
- Hiya I'm Tonya! I'm an avid psper, have been for a few years and finally have me a blog that I've been working on slowly getting stuff added to. I started writing tuts and recently started making masks and templates. I LOVE to see creations you've made with my things, if you'd like to email me please do so at aquaspinner@gmail.com ................................................. My TOU are as follows: All of my items are personal use only NO Commercial Use, please do not share (distribute) my stuff in groups, just send people here to grab please. ♥ Tutorial writers, if you wish to use my stuff in your tutorials, of course I am honored! You're more than welcome to use my stuff in them, I only require that you link to me and send people here to grab the goodies that you are using in the tut. ................................................. Hope you'll enjoy what I have for ya and thanks for stopping by. ♥
Cluster Frame TOU
Thank you SO much for being so interested in my cluster frames. I love that you enjoy using them.
However I do have a request, please do NOT credit me as the cluster frame on your tags. Although I assembled it, I do not believe I deserve any such credit. If anything, please list Scrapkit by, (assuming you didn't add other bit by a different designer to your tag of course). I'd prefer not be given credit for simply assembling the cluster frame. Thank you ♥
Followers
Tuesday, May 2, 2017


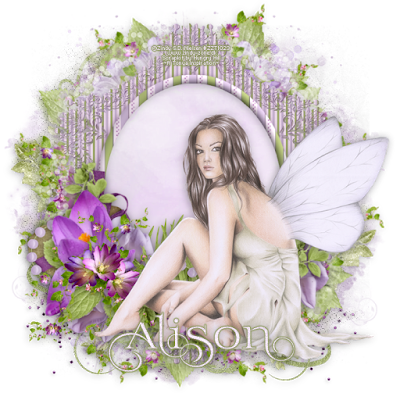
- Apply any other of the gorgeous elements behind your frame and leaves background, I chose to put Doodle 2 and duplicated and mirrored and flipped to the other side, just arrange to your liking however, I also used the Glitter Spill and move around to wherever you want to have it peek through to add just a little extra sparkle to your creation.
- Above your Muras effect, I pasted Light Effect 1 and then I used Flowerpot and duplicated a few times, as that was under the frame but above the other pretty elements to add a bit of flower design to your creation, once you are happy with how you have it arranged, I merged the flowerpot layers together. Above this I then put Light Effect 2 - downsizing a bit and then duplicated and flipped, duplicated again and rotated by 90°, duplicated again and flipped and mirrored, you should have 4 copies of that element, after I placed them how I wanted, I merged those layers together to keep everything tidy.
- Place your tube on the top copy and position to your liking, after I did this, I then placed other elements from the kit to however I thought looked good, there was so much to choose from and with a kit this gorgeous, you cannot go wrong no matter what combination you come up with!
- After I had all of my tag assembled to how I liked it, I closed off my background layer again, and did a Copy Merged so I was getting a copy in one layer of what my tag looked like and pasted it on the bottom of all of my tag. I applied a gaussian blur of 5 to it and downsized by 85%. The reason for this is so that the next step doesn't go over the edges and get cut off. I then applied Screenworks (Lace Screen) to that layer. The effect was rather pretty to it, so I moved it up and to the left a bit, duplicated, and moved over to the right, place them however you like for the effect you are trying to achieve.
- Add any masks you like, they are not crucial to the tag with all of the other effects we have already done, that is mostly personal preference. I used a few masks in mine by Moonbeams & Spiderwebs, I adore her masks, hers are one of my go-to sites!
- At this point make sure you add your drop shadows, to whatever preference you have, I change mine up throughout the tag as that tends to add a little bit of depth to the creation.
- Re-size your tag at this point and crop any of the excess off. I usually will add a layer at the bottom, flood fill with a dark color so you can see any sparkles and such being careful not too crop any shadows off so we don't have any jagged lines on ending creation. Add your credits after re-sizing so they are as clear and readable as possible.
- Add your text on it at this point, and adding in any effects you may like to do to your text.
- Save as a png and voila we are done! I hope you found this painless and maybe learned a tip or two. ♥
Subscribe to:
Post Comments
(Atom)
Labels
- CDO (1346)
- Wallpapers (756)
- Timeline Set (395)
- CDO Bonus Tube (264)
- Dees'Sign Depot (231)
- Ladyhawwk Designs (226)
- Verymany (174)
- Tasha's Playground (138)
- Chichi Designz (135)
- CDO CT (130)
- Barbara Jensen (126)
- Foxys Designz (126)
- FTU Cluster Frames (120)
- Snag Sets (118)
- Hungry Hill (117)
- Honored Scraps (107)
- Rebel Dezigns (106)
- CDO Scrap CT (87)
- Gimptastic Scraps (82)
- Animated (72)
- Karmalized Scraps (72)
- Rebecca Sinz (62)
- Gothic Inspirations (56)
- Freebie (55)
- Chaos Priestess (54)
- CDO Scrapkit Bundles (52)
- Kissing Kate (46)
- Rieneke Designs (43)
- PTU Tutorials (42)
- Gradients (36)
- PTU Clusters (34)
- Zindy Nielsen (32)
- Templates (29)
- A Space Between (25)
- CDO Retired Bonus (25)
- Mystical Scraps (24)
- Creative Scraps by Crys (23)
- FTU Tutorials (22)
- CDO Collab Kits (20)
- Keith Garvey (20)
- Masks (20)
- Kizzed by Kelz (19)
- CDO Diamond Club (17)
- Forum Set (15)
- Scrappin' Krazy Designs (12)
- Doodle by Design (11)
- Schnegge Scraps (11)
- Special Note (11)
- AoRK (10)
- Birthstone Series (10)
- Monti's Scraps (10)
- Christmas (9)
- Treasured Scraps (9)
- No Scraps Tutorials (8)
- Whisprd Dreamz (8)
- Zlata M (8)
- CDO Scrap Collab (7)
- Digital Art Heaven (7)
- Pink Paradox Productions (7)
- CT Collabs (6)
- Dark Yarrow (6)
- Sophisticat Simone (6)
- TK Dezigns (6)
- Layouts (5)
- Textures (5)
- CDO Exclusive Tube (4)
- Creative Misfits (4)
- Irish Princess Designs (4)
- LML Designs (4)
- Curious Creative Dreams (3)
- Dance in the Rain (3)
- Freeks Creations (3)
- Raspberry Road (3)
- Awards (2)
- CDO Cluster Packs (2)
- Mellie's Beans (2)
- Scrapkits (2)
- Thank You! (2)
- Wicked Princess Scraps (2)
- sylly creationz (2)
- 'how to' tutorials (1)
- Blinkies (1)
- CDO Animation Collab (1)
- TOU (1)
Leave Some Lovin'
Search This Blog
Blog Archive
-
►
2020
(187)
- ► November 2020 (19)
- ► October 2020 (17)
- ► September 2020 (26)
- ► August 2020 (19)
- ► April 2020 (14)
- ► March 2020 (22)
- ► February 2020 (18)
- ► January 2020 (15)
-
►
2019
(178)
- ► December 2019 (17)
- ► November 2019 (20)
- ► October 2019 (10)
- ► September 2019 (15)
- ► August 2019 (8)
- ► April 2019 (18)
- ► March 2019 (16)
- ► February 2019 (13)
- ► January 2019 (18)
-
►
2018
(263)
- ► December 2018 (16)
- ► November 2018 (27)
- ► October 2018 (22)
- ► September 2018 (17)
- ► August 2018 (19)
- ► April 2018 (23)
- ► March 2018 (28)
- ► February 2018 (21)
- ► January 2018 (24)
-
▼
2017
(253)
- ► December 2017 (11)
- ► November 2017 (16)
- ► October 2017 (23)
- ► September 2017 (15)
- ► August 2017 (22)
-
▼
May 2017
(16)
- • Gothic Rose •
- • Lost in Thoughts •
- • Serenity of the Night •
- • Enys Guerrero Package 29 •
- • My Heart to Yours •
- • Under my Spell •
- • Wisteria •
- • Your Words •
- • In My Garden •
- • Got The Blues •
- • Sara Butcher Package 55 •
- • Hello World •
- • Vintage Roses •
- • Fairy Melodies •
- • Gothic Fantasy •
- • Spring Fairy Sparkle •
- ► April 2017 (28)
- ► March 2017 (21)
- ► February 2017 (33)
- ► January 2017 (25)
-
►
2016
(342)
- ► December 2016 (28)
- ► November 2016 (27)
- ► October 2016 (30)
- ► September 2016 (23)
- ► August 2016 (25)
- ► April 2016 (31)
- ► March 2016 (27)
- ► February 2016 (32)
- ► January 2016 (29)
-
►
2015
(362)
- ► December 2015 (35)
- ► November 2015 (43)
- ► October 2015 (29)
- ► September 2015 (27)
- ► August 2015 (34)
- ► April 2015 (31)
- ► March 2015 (31)
- ► February 2015 (22)
- ► January 2015 (25)
-
►
2014
(150)
- ► December 2014 (18)
- ► November 2014 (20)
- ► October 2014 (14)
- ► September 2014 (10)
- ► August 2014 (11)
- ► April 2014 (12)
- ► March 2014 (13)
- ► February 2014 (14)
- ► January 2014 (8)
-
►
2013
(37)
- ► December 2013 (3)
- ► November 2013 (6)
- ► October 2013 (3)
- ► September 2013 (2)
- ► August 2013 (4)
- ► April 2013 (1)
- ► February 2013 (2)
- ► January 2013 (4)
-
►
2012
(8)
- ► December 2012 (2)
- ► October 2012 (1)
- ► March 2012 (1)
- ► February 2012 (2)
- ► January 2012 (1)
-
►
2011
(20)
- ► December 2011 (4)
- ► November 2011 (2)
- ► April 2011 (1)
- ► March 2011 (3)
- ► February 2011 (2)
- ► January 2011 (3)
-
►
2010
(42)
- ► November 2010 (1)
- ► October 2010 (1)
- ► September 2010 (5)
- ► August 2010 (2)
- ► April 2010 (3)
- ► March 2010 (4)
- ► February 2010 (5)
- ► January 2010 (16)
-
►
2009
(23)
- ► December 2009 (8)
- ► November 2009 (4)
- ► October 2009 (11)


HAPPYhappyHAPPYhappyHAPPYhappyHAPPYhappy!!!!!!
ReplyDeleteMwaaaaaaaaah! I enjoyed writing this one up too, so happy you enjoy this surprise (ooooooh this might have been the thought that I had percolating the other day ♥).
Delete