About Me

- Tonya
- Hiya I'm Tonya! I'm an avid psper, have been for a few years and finally have me a blog that I've been working on slowly getting stuff added to. I started writing tuts and recently started making masks and templates. I LOVE to see creations you've made with my things, if you'd like to email me please do so at aquaspinner@gmail.com ................................................. My TOU are as follows: All of my items are personal use only NO Commercial Use, please do not share (distribute) my stuff in groups, just send people here to grab please. ♥ Tutorial writers, if you wish to use my stuff in your tutorials, of course I am honored! You're more than welcome to use my stuff in them, I only require that you link to me and send people here to grab the goodies that you are using in the tut. ................................................. Hope you'll enjoy what I have for ya and thanks for stopping by. ♥
My Artist CTs ♥

My CTs ♥


My Guest CTs ♥


Friday, December 30, 2011
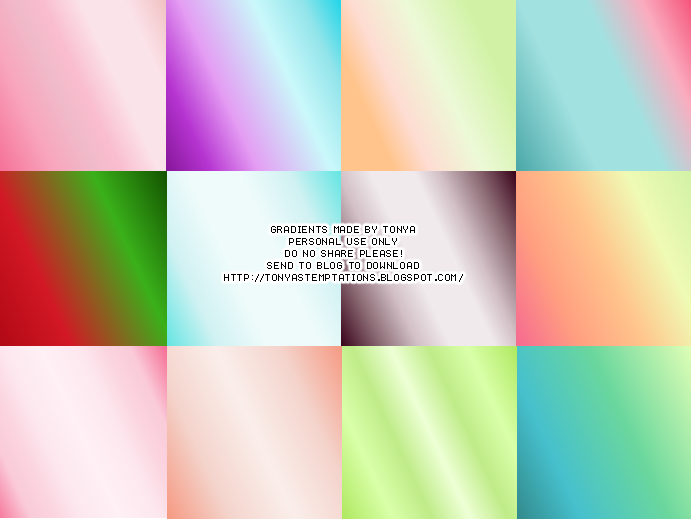
A friend of mine said I should do some pastel gradients and I love pastel colors so I whipped up this set of 16 gradients, hopefully this might be what she had in mind hehe. Anywhoo hope you will all enjoy these gradients
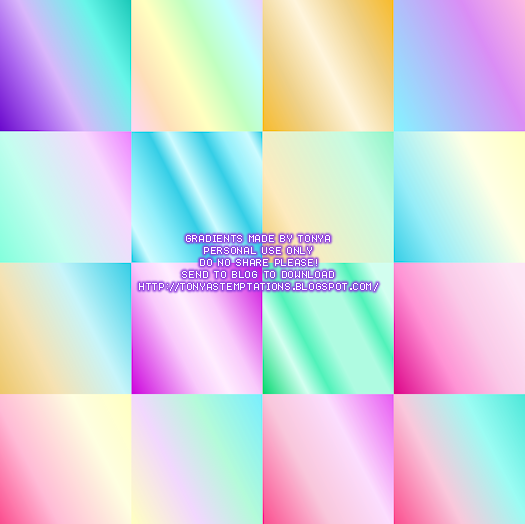
and if you'd like them, you can DOWNLOAD HERE, leave some lovin' if you enjoy these please ♥
Thursday, December 29, 2011
Sooooo I had wanted to do some New Years gradients as had been suggested but I went blank on some of the color tones LOL so I had made these kinda as I was making various tags based on different New Years tubes I played with. Not sure if ya have use for em but if you do here ya go ♥ Gonna do some pastelly ones next......... stay tuned as I seem to be having some fun making these right now lol
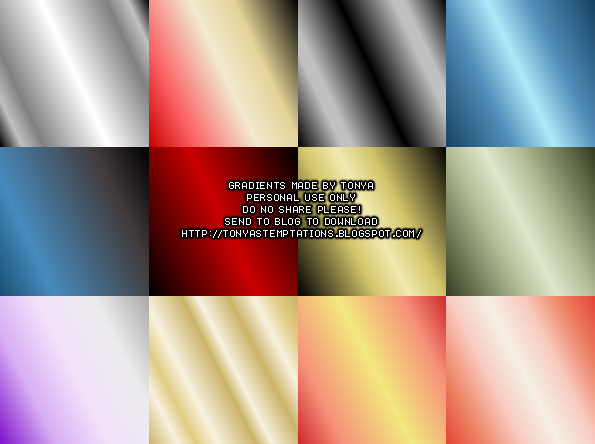
and you can DOWNLOAD HERE
Sunday, December 25, 2011
Soooooooooo quite some months ago Deb of Creative by Nature had very sweetly re-designed my blog but I had a slight problem - my blinkie no longer matched and those of you that know me......... know that I have a matching fetish hehe. So in Creative Misfits I ran a lil contest because well to be perfectly honest I suck at animating tiny things especially blinkie size and cannot do em justice. The winner was Sandy she done up a fabulous one for me so I'm finally getting it uploaded hehe.
Isn't it cute? I love the wording she used, so if you follow my blog feel free to snag my blinkie. I'm gonna be re-doing my following blogs cuz well there's a ton I need to add hehe. Stay tuned! ♥
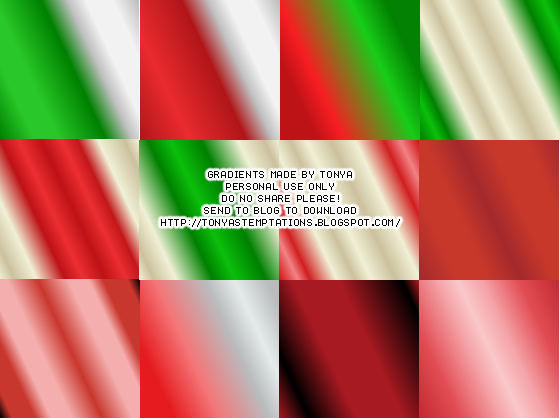
Friday, December 23, 2011
Sooooo I had made some gradients here n there as I was tagging mostly to match my tags lmao so I thought I'd upload em so here is a set of 16 of them. Lots were to go with Christmas taggies but could probably be used year-round too. Here's a lil preview I put together:
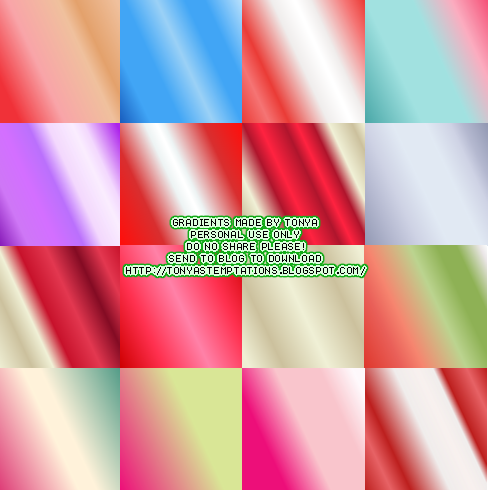
and you can DOWNLOAD HERE if you would like to use em. Please leave me some luv so I know if I should keep on creating hehe.
Monday, November 28, 2011
Okay thought I'd play some more with some gradients, not quite sure on a couple of them but I'm sure some taggers would love to play a lil with them? Anywhoo here they are, please leave me some luvin' if you like em so I know if I should make more LOL!
Friday, November 25, 2011
Soooooooooooooo I did something different and made some gradients lol! Here's a pack of 12 gradients I did this morning hope you like em. ♥ I love lots different color options so thought I'd give this a go. Hope to make more again at some point if ya like em.
and you can get them HERE
Enjoy and please leave me some luv if you like em so I know if I should keep creating hehe. ♥
Sunday, June 12, 2011
I've got some new masks up woohooooo, just a few quickie ones but I hope you can use em perhaps on your creations. Here be a preview of them:
and you can get them here: DOWNLOAD on Box or DOWNLOAD on 4shared Please leave me some luv'n if ya like em ♥
Saturday, June 11, 2011
Well if you've been here before you'll notice my blog has had a makeover! I LOVE LOVE LOVE the new look and it's thanks to a dear friend Deb of Creative By Nature and I just can't thank her enough for what she did. She did every one of my requests. I wanted it pink n girly and I just love the tube in the header wooohooo, so THANK YOU Deb you're the bestest!
Monday, May 16, 2011
Thought I'd share a couple of masks I made tonight. Here is a preview of them:
You can DOWNLOAD HERE on Box Please leave me some luv if you like em. ♥
This is the tag we'll be making and what you'll need:


• Tube I used was by Selina Fenech which was available for purchase through CILM which is no longer open and the artist is not currently selling her art
anymore, hopefully soon though! If you don't have this tube, just find another pretty tube to use, mermaids have an awesome effect on this tut! Please do
not use the tube I used without a proper license to do so.
• Filters I used were VM Toolbox Zoom Blur, Toadies Plain Mosaic Blur, Xenoflex 1 Show Door, Xenoflex 2 Constellation, Xero Porcelain, Super Blade Pro,
Eye Candy 4000 Glass, and Eye Candy 4000 Gradient Glow.
• Font used was Aquarelle which is a pay font and I cannot supply, however any pretty font will do.
Okay ready, let's go, this is super easy! Back to the old style psp tags we learned on before scrapping came into the picture lol!
• Open a new image 700 x 700 with a white background. We can hide the white layer and re-size as needed. Paste your tube onto the canvas and I applied a gaussian blur of about 10 to it. I duplicated a few times and flipping them as I went. In the end you want a blurry mass of the tube LOL! If it's taking up the majority of your canvas, re-size down so it's only about half as some of the filters take up a lot of space and you don't want the effects cut off.
• Make sure that your background and foreground colors are on white otherwise you will have some very funky glows that you didn't look for. Apply VM
Toolbox Zoom Blur, I used settings of 105 and 60. Re-size your effect a little bit. Apply Xenoflex 1 Shower Door to this effect, I had settings of 50 and 20.
Duplicate the image and re-size by 90% and apply Toadies Plain Mosaic Blur, I had all my numbers at 15. Zoom in a lot! Grab your magic wand too and select those black lines and press delete. Leave selected and select invert selections and apply Super Blade Pro coconut ice setting. Leave your selections active for the next step.
• Paste tube as a new layer, making sure that your selections are still active. I moved mine over the right side and down a little. Press delete on the tube layer, this way only the stuff in your selections stay. Change the blend mode to Luminance (Legacy). On your original tube mirror it and copy. Paste it onto your working image and do the same thing (move into position this time on the left, press delete, and change blend mode). Once happy with all this select none. If you're not happy undo until you can fix what you don't like.
• On the Toadies and SBP effect layer, select all, float, and defloat and apply Xenoflex 2 Constellation to this layer to give it some sparklies if you wish. The settings I used are below here:

• Paste your main tube as a new layer, re-size if necessary and sharpen. I applied Xero Porcelain to give the tube a nice glowing effect and of course a drop shadow. At this point I re-sized my tag to it's ending size and sharpened and bits that needed it.
• Add a new layer and type whatever text you want, I typed Siren of the Sea as it seemed fitting with the mermaid and all. I typed it in a nice pretty blue color from my tube and applied Super Blade Pro coconut ice and and of course Eye Candy 4000 Glass and Eye Candy 4000 Gradient Glow with a drop shadow. Add a new layer and put in the artist's copyright information as well as your taggers line if you use one.
• Just add your text, I used the same font and settings for my name as I did on the Siren of the Sea wordart I made.
• Hide or delete your white background, optimize as a png and voila you're done!
That's it! I hope you've enjoyed this very easy tutorial.
This tutorial was written by Tonya on May 16, 2011 and absolutely no part of this tutorial may be taken or used without my express permission.

This is the tag we'll be making and what you'll need:
• I used a mask from the awesome Melissa, please leave some love if you download. I used mask 6.
• Tube I used was by Keith Garvey which is available for purchase through PSP Tubes Emporium, any tube that you wish to use will do though. Please do not use the tube I used without a proper license to do so.
• Filters I used were Xenoflex 2 Constellation, Xero Porcelain, Super Blade Pro, Eye Candy 4000 Glass, and Eye Candy 4000 Gradient Glow.
• Brushes of choice
• Font used was Caramel Candy which is a pay font and I cannot supply, however any pretty font will do.
Okay ready, let's go, this is super easy! Back to the old style psp tags we learned on before scrapping came into the picture lol!
• Open up a new canvas 700 x 700 with a white background. (If you don't like the white background you can close it off later no worries). Chose 2 matching colors from your tube to create a foreground-background gradient. I used 2 peachy colors from the tube that I used. I had mine set to sunburst in the gradient style at a 0 degree and repeats of 4. Add a new layer and flood fill that layer. Apply Melissa's mask 6 to it. DO NOT MERGE yet lol.
• Paste the closeup of your tube on top of the gradient layer but below the mask layer. Re-size if you like, I didn't bother to do that, I just moved it over the right a bit. Duplicate and mirror and arrange so it looks however you want. Merge down so that your 2 closeup tubes are on one layer. Duplicate. On the top copy apply a gaussian blur of about 5 and choose the Screen blend mode and lower the opacity to about 55. On the gradient layer, I applied Xenoflex 2 Constellation with the following settings:

• Merge your mask layer group. Add a new layer under the mask layer and making sure that your materials palette still has your gradient colors selected apply a doodle brush in a couple places so that it looks like it's peeking behind the mask layer. See my tag as an example. Add another layer and still beneath the mask layer, I added a few more brushes, the ones I used were by Distinct but anything with a swirly pretty pattern will do beautifully. This is where you can make your tag truly your own.
• Copy and paste the tube as a new layer on top of the mask layer, I used the half body one (or full tube) instead of the close-up here. Re-size to your liking and once happy, apply any tube effects you like such as Xero Porcelain (for example), drop shadow, etc.
• Because I don't like when tubes are 'cut-off' so to speak I wanted to hide how her legs ended, so I took my preset shape tool, set on ellipse with the foreground closed off and background just using one of my peachy colors from my gradient I made earlier. I drew a nice oval and once I was happy with where it was positioned, I converted to a raster layer. Select all, float, de-float and apply Super Blade Pro with the 'coconut ice' setting. Once happy, select none.
• Add a new layer and grab your brush tool again (LOL I love using brushes!) and I added some cloud brushes over the oval just to give it a bit of a dreamy appearance. You may find need to do a few of them. Once happy, re-size your tag to it's final ending size however you want that to be. Do an sharpening of images that need it and of course any drop shadows if not done already. Add a new layer and add your artist copyright information and if you use a tagline.
• Now just do your text, I had mine placed on that oval we made earlier and used the font Caramel Candy however any nice pretty font will do. I just used the peach color I did my oval in and applied the Super Blade Pro coconut ice setting again, as well as Eye Candy 4000 glass (it gives a little extra shine to it) and then gradient glow with Eye Candy 4000 and of course a nice drop shadow.
• Hide or delete your white background, optimize as a png and voila you're done!
That's it! I hope you've enjoyed this very easy tutorial.
This tutorial was written by Tonya on May 16, 2011 and absolutely no part of this tutorial may be taken or used without my express permission.
Monday, April 11, 2011
OMG! I have a new tutorial up............... I think it's been at least 6 months since I've written one LOL

This is the tag we'll be making so, here's what you'll need:
• Tube I used was by Jamie Kidd which I purchased from CILM, however they have since closed down and her stunning art can now be found at CDO. Please do not use her art without a legal license to do so.
• Template I used is by the awesome Cakes and you can get it here thank you hon for the awesome temp!
• Mask I used was from incredible Vix here I used her big mask 1 lol.
• I used the scrapkit by the very talented Tamie of Addictive Pleasures I just adore her kits and this one I used was a freebie! You can get it here. I just adore her kits, have many of them from her store LOL!
• Filters I used were: Tramages Tow the Line, Tramages Pool Shadow, Xero Porcelain, Eye Candy 4000 Glass, and Eye Candy 4000 Gradient Glow.
• Texture I used in background of circle is here.
• Font used was Fansi Pensle Two, but use whatever font you wish.
Okay ready, let's go, make a fab tag! It's been so long since I've written a tutorial I hope I remember how lol!
• Open up Cakes' fabulous template, made a copy of the image by doing Shift & D, this way you don't make changes to the original. Delete her credit layer by pressing delete. Floodfill that layer white, and send that layer to the bottom of your template working canvas by right clicking on that layer, arrange, and send to bottom. I do this so it's easier for me to see what I'm doing. Don't worry you don't have to save it with white background, just don't merge all your layers together lol. At this point I cropped out the excess stuff so that the image is more square-like. Makes it easier later when you do your mask so it's more proportional.
• Okay let's start prettying up this template! On Layer 8, select all, float, defloat, add a new layer. I used the gradient foreground-background which comes with psp set at linear with angle of 45, repeats of 3. I used black as one of the colors and chose a color of the tube I used for the other. On the new layer flood fill, keeping selected, add a new layer again and paste the texture in as a new selection. I changed the blend mode of the layer to Luminance (Legacy) on this one. Select none and delete the original layer 8.
• On layers 6 and 7 we will be doing the same thing lol. Using your manual color correction tool, choose your source as the black color on there and choose the target to be that color from your tube that you chose for your gradient. On each of the layers, I applied the texture effect blinds which comes within your psp. Just go to Effects > Texture Effects > Blinds. I used settings of 5 for width, 62 for opacity, and #ddcac7 as the color, with horizontal checked.
• On layer 5 we'll leave that black layer, but select all, float, defloat and apply Tramages Tow the Line with the default settings. I always tend to do the selections as it does seem to look different, more defined than without selections, but it's all personal choice. Now I like to make the lines colored instead of the white/silver, so I scroll in a lot and use my manual color correction to adjust those. Be careful you don't select the black, but the color in the lines as your source. The mauve color I've been using throughout the tag as my target.
• On layer 4 I used manual color correction to change that brighter pink to be more mauvey to match my tag. #c26c9f was my source and the mauve color my target. Alas that didn't work all the way some yellowish tones in there so I colorized to bring the tone all mauve and warm. Just colorizing from the start didn't make the tone of the layer as warm.
• Now layer 3 I tinkered with a tiny bit. I used my magic wand and clicked in the black part of the circle and clicked on promote selection to layer. Select none. Now you should still have your full circle, select all, float, and defloat. Add a new blank layer. Remember that gradient we made? I changed mine to the sunburst mode (option 3 on the gradient window), with angle of 0, and repeats of 3. Floodfill that gradient into the new layer you just created. Keep your selection and add another new layer and once again paste your texture into your selection on that new blank layer. Select none and I changed the texture layer to Screen blend mode. (I LOVE blend modes LOL!) On that half black circle that should be above your texture at this point. If it isn't.... move it there lol.
• On layer 2, all I did here was changed the white to the mauve color using my manual color correction tool. I changed the blend mode on those dots to Screen as well.
• Layer 1 is your glitter frame circle, I just used manual color correction and colorize just like I did for layer 4.
• Now for the wordart, this can get some tedious but this is how I do mine lol. On the Glitterback layer, I just used manual color correction and colorize again like I did on layers 4 & 1. On the whitewaback I selected around the word prettier. As you can see in my example that word has a black background and the rest mauve. I took freehand selection tool, scrolled in so image huge on my screen lol. Now once you have carefully selected around the part of the word pretty, I used manual color correction tool to change the white to black. Keep selection and invert your selection. Change the white to the mauve color. Continue to keep selections. Now on the wa layer (the main wordart), invert selections again so you are back to having Prettier selected and change the color from that brighter pink to mauve using once again the manual color correction tool. (Can ya tell I love that tool???)
• Well now we have a pretty template! But we need to add a stunning tube to it. I used the Jamie Kidd one as you can see, one of the reasons I love tagging hers is she includes closeups, so I had the texture layer on my big circle selected. I re-sized by 90% and moved over to the left just a little, changing the blend mode to Soft Light. I duplicated and mirrored this layer. Moving over to the right just a little and even up just a smidge so it doesn't look identical mirror image, gives some more perspective on it. On your circle texture layer, select all, float, defloat, invert selections and then on each of the closeup layers, press delete. This removes any excess overhang of the closeup and makes it look all purdy. You may see a link down the middle where they overlap, don't worry about that. Our main tube will cover that up beautifully!
• Be only layer 1 (this is your glitter frame around your circle. Paste the tube half body layer on top of this and position to liking. See my finished tag for reference. Now once you got her into place we're gonna take care of the body overhang. With your magic wand, select inside of layer one and invert selections, contract selections to 1. Grab your eraser tool. It's important to be precise on this next one so scroll in good. With your tube layer selected, erase the outer part of the bottom of the tube hanging over edge. I avoided erasing any of her hair. Once you've erased that part, and are happy with the look select none.
• Now let's put our mask in. On the white background layer, add a new layer, flood fill with your gradient, I used the sunburst setting and then applied Tramages Pool Shadow filter to it. Now I can't remember the settings on it but just fiddle around til you find a setting ya like. Then I applied a mask of Vix' and merge layer group. I used my deform tool to make the mask effect more noticable on the tag, just be careful you don't cut your edges on the tag if you don't like to see those lol. As you can see in mine some edges there, it's often hard to avoid in some tags.
• At this point, I re-sized my finished tag so that I can do any tube sharpening etc effects to it, I used Xero Porcelain on the tube.
• On the top wordart layer, I applied a nice gel-ly inner bevel, whatever your favorite one is and because I like shiny things hehe I applied Eye Candy 4000 Glass to it. Use whatever your fave glass setting is. Add your elements of choice throughout the tag. At this point I also added the artist's copyright and of course my waterwark. I always add this after I re-size! If I do before it'll look distorted. I added Eye Candy 4000 Gradient Glow to various layers, whatever your preference is. At this point also do all of your drop shadows. I just used the drop shadow within PSP for this.
• Add your text, on mine I applied an inner bevel, Eye Candy 4000 Glass and also Gradiant Glow and of course drop shadow. Hide the white background layer and save your tag as a png and you're done woohooo!
WOW that was a wordy one LOL I hope you enjoyed and learned something different. ♥
This tutorial was written by Tonya on April 11, 2011, absolutely no part of this tutorial may be taken or used without my express permission. Any part that may be similar to any tutorial is purely coincidental and unintended.
Saturday, March 12, 2011
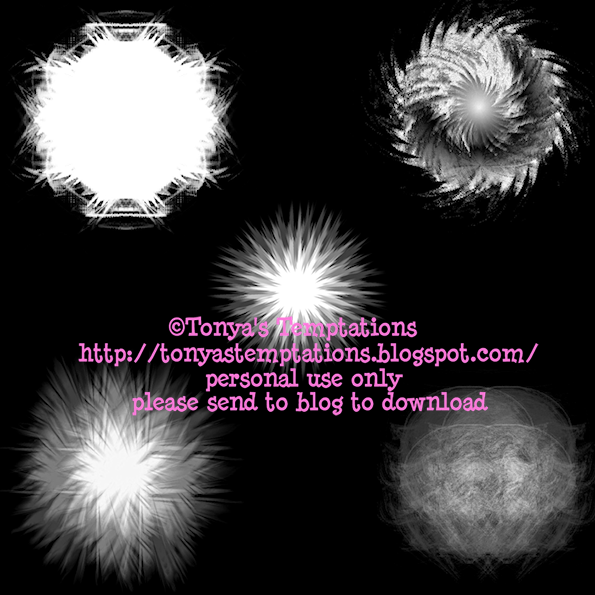
I've done up a new set of 10 masks for you all to play with. I hope you can use em, I am newish to this yet so I just play around with filters n stuff lol. Enjoy and please leave me some luvin if you download. ♥
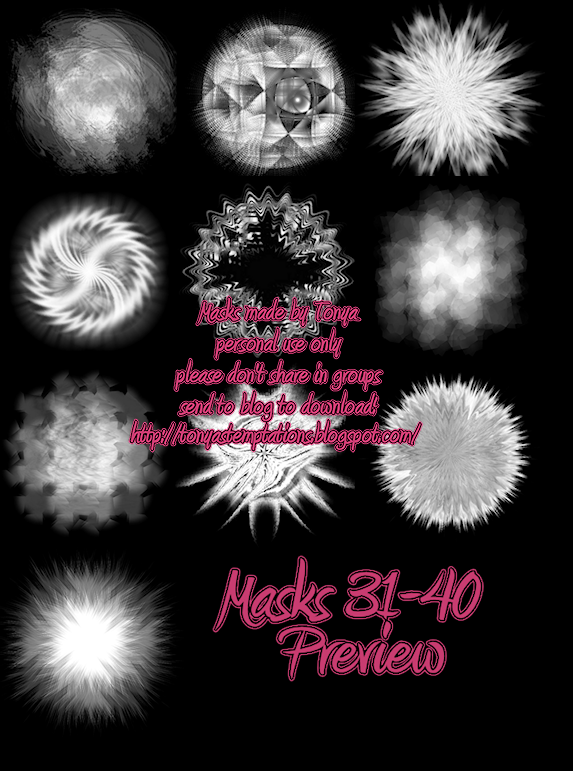
and you can get DOWNLOAD HERE
Yayyyyy another set of masks as part of a Creative Misfits challenge. I only done 3 of them but there are lots of others, be sure to check em out!
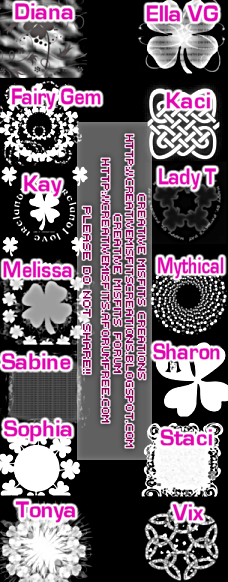
you can get them on the Creative Misfits blog have fun with em! ♥
Saturday, March 5, 2011
Sooooo I done a couple more masks as part of a challenge at Creative Misfits, be sure to check em out, all that contributed made some awesome masks to use!
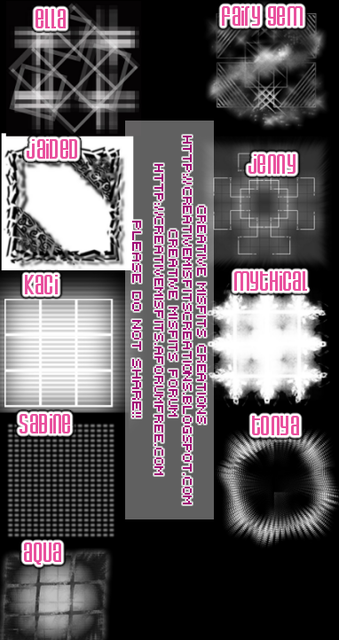
and you can get them on the Creative Misfits blog, enjoy and have fun with them!
Sunday, February 13, 2011
I've made 5 love/heart masks as part of a Creative Misfits mask-making challenge, there are lots of fabulous ones there so be sure to check em out!
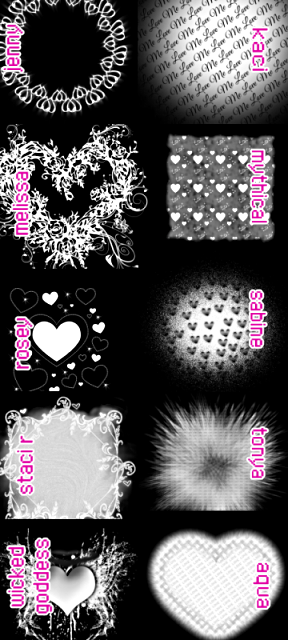
and you can get them on the Creative Misfits blog here
Enjoy and happy creating! ♥
Quite some time back I had my blog layout redone by Tamie of Addictive Pleasures and I love it but I wanted a blinkie to kinda match it lol so I sought out suggestions on this. I was directed to Angel of Angel's Designz and so finally did so. I had attempted to make one but ugh I'm so not good at animation and making small things lol so I thought I am giving this a try. She did not disappoint in any way! If you need to get a blinkie made I highly recommend checking out her site. You can see some of her work too on her blog.
My new blinkie if you'd like to link to me on your blogs and sites ♥

Sunday, January 30, 2011
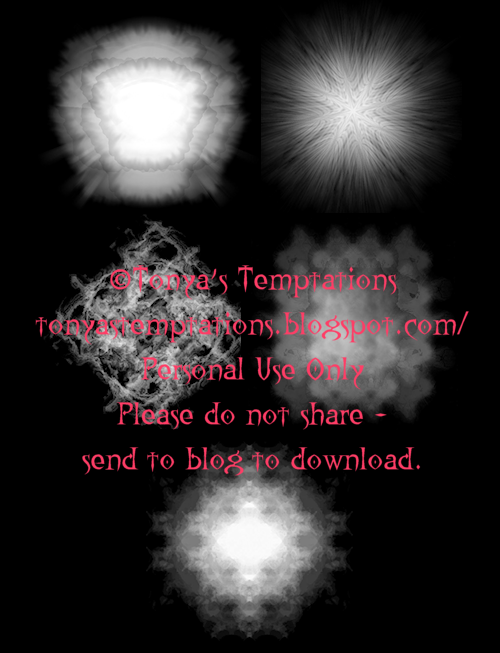
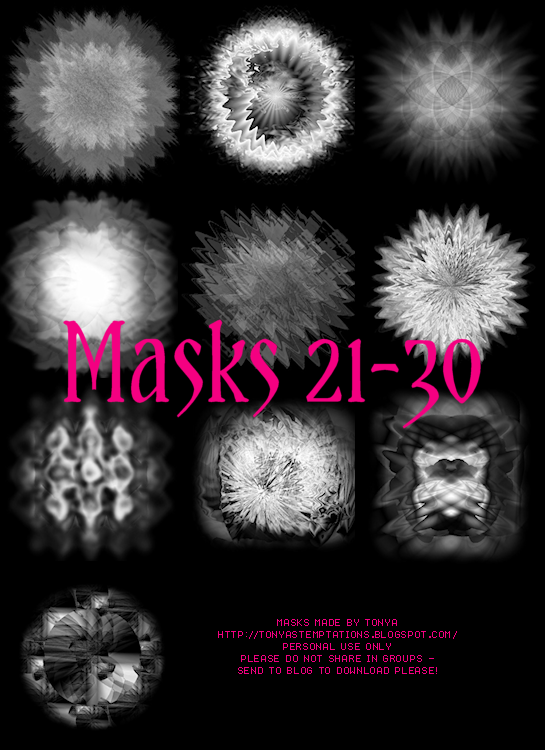
I've got some new masks up for ya if you can use them, was just playing around with some filters and stuff, hope you like em! ♥
You can DOWNLOAD HERE on Box and enjoy! Please leave some lovin' if ya download ♥
Thursday, January 20, 2011
Woooohooo I participated in a mask-making challenge at Creative Misfits, theme of naughty and here they are, great work everyone that did these, here's a preview:

and you can get them on the Creative Misfits Blog, please leave some luvin' if ya snag ♥
Sunday, January 2, 2011
hehe I made 5 snowflake masks as part of a snowflake and winter mask challenge with Creative Misfits and all the masks are awesomeeeeee! Be sure to go check em out, here's a preview

and you can get them on the CM Blog and hope you have fun with em!
Subscribe to:
Posts
(Atom)
Grab My Blinkie
